Yesterday I harvested 30 bulbs of garlic. Now they are drying out on cardboard boxes in the garage. They will stay there for a month until their leaves are dry and brown, at which point I will cut their leaves off and trim their roots. Then they will simply be stored in cardboard boxes single stacked until needed. This is hard neck Russian red garlic. I will save three bulbs and plant each clove separately in October. These bulbs were fertilized With chicken manure and fish fertilizer every other week starting in April. Note: I do not try to get all of the dirt off of the bulbs. I knock off what I can; however, whatever is on the bulb will stay until the entire bulb is dry. At that time I use a soft brush to brush off whatever dried dirt is left. I also do not try to take the skin off. In addition, you should definitely leave some of the roots… About half an inch.
IMPORTANT…. I try to harvest when the soil is fairly dry. I mentioned this because someone asked me if I rinse them off to get the dirt off. I definitely do not. The reason I harvested yesterday is because we are expecting a lot of rain for the next week, and they had already sent up scapes, the flower stalk, so they were ready to harvest. One more thing… As you can see, the roots are quite long. Therefore I use a good size shovel to dig them up. Definitely do not grab the leaves and try to pull them out of the ground! They need to be dug up with a shovel , carefully so that the garlic is not damaged.
First: I have seen a lot of ladybug larvae around. As I was driving home from the food store, one was attached to my front windshield. I know I’m crazy, but I drove home the entire time trying not to blow it off the front windshield so that when I got home I could take it off the windshield and put it on a plant. We know ladybugs are wonderful helpers in the garden . They especially love to eat aphids, and as a big rose lover, that is a huge help to me.So here is the reminder and also a picture I just took of a ladybug larvae on a rose leaf.
Second:If you are looking for a good deer repellent, I use Deerout and find that it works great. This is an important time to make sure to use it, since most lilies are budding. That is their favorite time to come and snack on Lily buds. Also, try to apply it after a rain. That’ll keep you hopping! Ha ha.
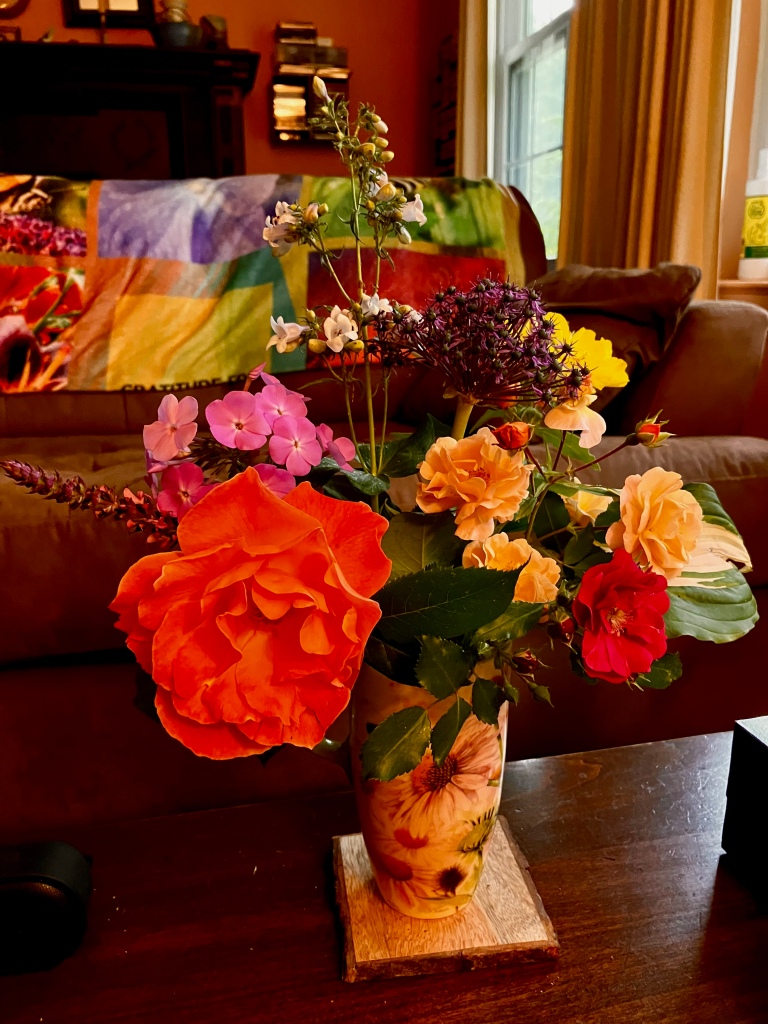
To emphasize my last entry on landscaping: This arrangement has 10 different flowers in it which are all blooming now. There are at least another 10 flowers blooming now in my gardens in addition to these. Those Include two types of iris, three roses, honeysuckle, weigela, and clematis.
I think the trickiest part of gardening is to figure out which plants to put where. The plant has to be the right size; It has to be suited to the light conditions available in that site, It needs to be hearty enough to survive whatever soil conditions exist on that area, and it needs to work with the other plants around it. It’s also important to keep in mind what time of the year the plant will bloom. I plant my perennials so that they will all bloom consecutively rather than all at the same time. It is quite tricky; however, If you walk past my home, you will always see some thing blooming from April until November. That’s eight months of consecutive bloom. In another entry I will try to give you some ideas of what blooms when. I have kept a journal that keeps track of when a plant comes into bud and when it blooms. All the pictures in this entry were taken this morning. Therefore, each flower you see is blooming right now on June 5, Cliff’s birthday!
As gardeners, We need to be aware of all of the plants requirements and of what the plant will look like when it is full grown. These are only some of the challenges of choosing landscape plants. In the following pictures are some of my favorite perennials and their locations.
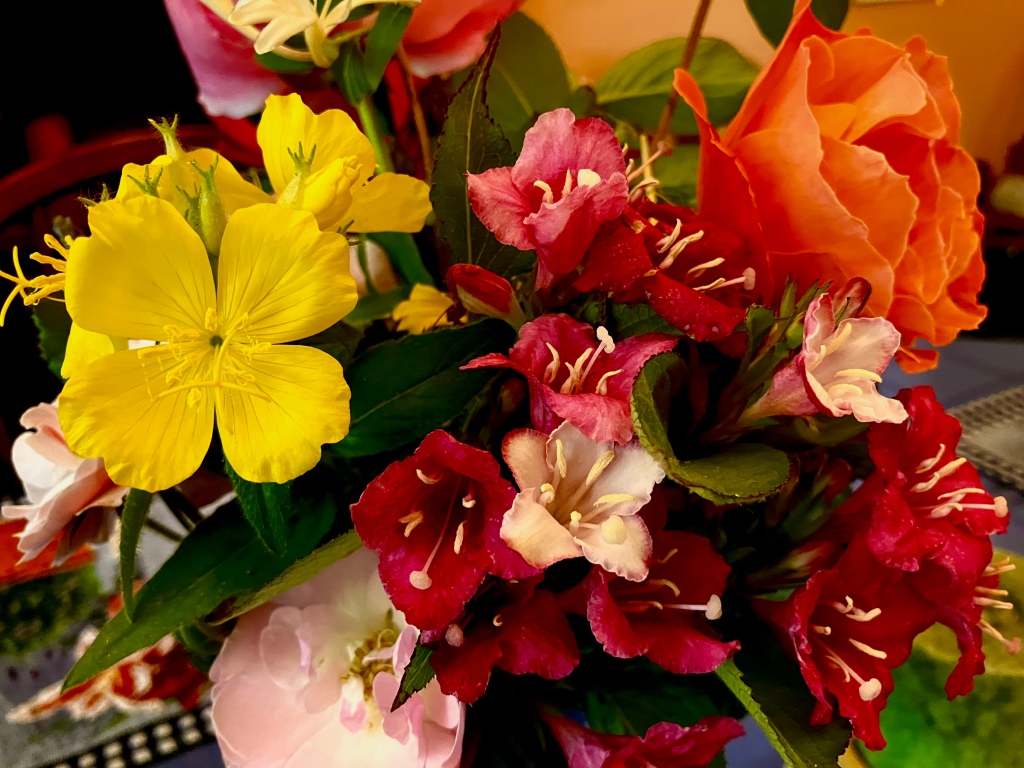
Above: a magenta heirloom rose which is very prone to black spot and needs lots of attention, an orange rose which I planted for Phoebe my orange cat which is called easy living and is much easier to care for than the heirloom.Below those is a salvia, Which I have been very pleased with this year. I have planted quite a few and it seems to have taken them about three years to really feel comfortable.
Here are some shots of some of the landscaped areas. The first two pictures are of two irises. The first is a Dutch iris, and below that is a Siberian iris. Below those are pictures of an Apricot carpet rose which has gotten much larger than I expected, and seems to be very happy where is… Near the mailbox, some red knockout roses in the front of the house, A view of the Street garden with yellow sun drops and red carpet rose, and some views of the walk garden. Look closely and you will see a very patient Dezi Who would like me to stop taking pictures and go inside! There is also a picture of pink phlox which is doing beautifully this year! I am very pleased that I finally have some beautiful phlox. Behind the phlox is purple allium which I am very pleased with. Allium is in the onion family and is very resistant to any bugs and diseases.
Every plant in this blog entry is a perennial or a shrub, and will bloom at about the same time every year.
These gardens are all a minimum of 15 years old and have been changed many many times over the years. I have probably lost at least 50 perennials that have been planted and have either succumbed to a disease or have just not thrived and did not come back for another year. Gardening is challenging! You all know that . And that is one of the things that makes it fun. It never gets boring, and you never have any idea what it will wind up looking like. It’s all a surprise!


You must be logged in to post a comment.